
I want to thank whoever made it socially acceptable to eat cinnamon rolls for breakfast! A sweet bread, rolled up with butter, sugar, and cinnamon. Then topped with an out of this world cream cheese frosting. Sounds like the perfect way to start my morning!

Who want’s to eat a banana split for breakfast?! I am always in the mood for a nice sweet breakfast but this one actually is going to be good for you! No need for any guilt here. Actually, you can feel good about yourself for making such a smart choice in eating this sweet bowl for breakfast this morning!
With bananas (of coarse), strawberries, blackberries, granola, and a low sugar yogurt, this breakfast is going to leave you and your family feeling full and energized for your day. My kids actually love having this for breakfast! I let them pick their own toppings and “cook” their own. Super easy to put together and fun for the kids! They love to help make their own food.

Who doesn’t like a sugar cookie? Really! There might be a handful of people out there who think it’s too sweet. What with all that sweet cookie base and the lusciously soft frosting caked on top! Yum! Well, first, that person is not me! Lets just make that clear. But to those sugar cookie unbelievers and to everyone else, these just might be the cookie to break your boycott!
If you aren’t looking to spend the time cutting out all the fun shapes and frosting the little darlings, then these will be perfect for you! This is my go-to sugar cookie recipe for when I need a sugar cookie fix but don’t feel like going through the “work” of making sugar cookies.


When I am thinking about Valentine treats the very first thing that pops into my head is chocolate and strawberries. When those two are put together, there really isn’t much more I need (other than my Valentine of course).

Cent Savvy Strawberry Chocolate Kabobs
This simple take on strawberries takes a different direction from the always appreciated chocolate covered strawberries. Instead of having the strawberries take the chocolate plunge, it was fun to tweak this treat a little and offer a different kind of Valentines treat.
Happy 2015! It’s always refreshing to start a new year. I’m not really sure what it is that makes it that way because in reality it is just another new day (not a bad thing). But it always feels good to know that you have a brand new year ahead of you!
I hope you all had a great Christmas! I had a lot of fun spending time with family and trying to relax. It was nice to dedicate a nice chunk of time to family but I am still super happy to be back sharing ideas on how to turn your pennies into pearls! So, what better way to start the new year than sweet? Right?
My mom’s birthday is New Years Eve and I asked her what she wanted for her birthday dessert, chocolate, peanut butter, maybe fruity? When she told me fruit, I knew exactly what I was going to make. Lemon cupcakes with a berry frosting!

Don’t you just love baking during Christmas time? I pretty much always love baking but I especially adore it when it’s this special time of year! This year I feel especially grateful for all of the amazing people we have in our life and I really do wish I could bring each and every person a special treat. But lets be real, I don’t have the expenses or time to do this. But I am going to try and get as many as possible!
First treat on the list, Chewy Marshmallow Caramel Popcorn! My husband and I really love this treat and you could probably find us eating it on any given weekend. So naturally I wanted to share it with our friends. It is sure to please and I am sure your friends would love it as well. It’s super easy to make!

Of coarse since I was giving this as a gift I needed to find something pretty to put it in. I went to the dollar store in hopes of finding a cute tin to package this delicous sweet. I was maybe a little too excited when I found these cute babies! They are actually for wine bottles but are perfect for popcorn! I found them at the 99cent store so maybe your local store will have them too!

You start by poping your three bags of popcorn and removing all unpoped kernels. Separate the popped popcorn into two separate large bowls. This makes it easier when you are trying to stir later.

Now combine in a large microwavable bowl your butter, brown sugar, and marshmallows. Start microwaving at one minute intervals. Stir after each session. Note: Make sure to be watching when this is cooking. The marshmallows can expand a lot and trust me, you don’t want to clean up an overflow of melted marshmallows in your microwave! Speaking from experience unfortunalty.
This is what mine looked like after each session. Once it gets to be a smooth liquidy consistency you are done with the microwave.

Now poor the caramel over the popcorn, half in each bowl. Mix well but softly until popcorn is covered in gooey goodness! It’s ready to be packaged and snacked on! Easy right!?

Add a cute ribbon and Christmas tag (you can find these free printables here) and you are ready to make someones day sweeter! Have fun!


Chewy Marshmallow Caramel Popcorn
2014-12-19 08:31:14
Super easy and delicious caramel popcorn.
Prep Time
5 min
Cook Time
4 min
Total Time
9 min
Ingredients
- 3 bags of microwave popcorn
- 1 cup butter
- 1 ¾ packed brown sugar
- 16 oz mini marshmallows
Instructions
- Pop popcorn and remove all unpoped kernals.
- Separate popcorn into two large bowels for mixing.
- Combine butter, brown sugar, and marshmallows in a large microwavable bowl.
- Start microwaving sugar mixture one minute at a time. Stir after each session. Once it gets to be a smooth liquidy consistency you are done with the microwave. Your total cooking time should be around 4 minutes.
- Poor caramel over popcorn, half in each bowl. Stir lightly to combine.
- Enjoy!
Pennies into Pearls https://www.penniesintopearls.com/
With Christmas less than two weeks away, this is usually the time I like to start passing out sweet treats to our family, friends, and neighbors. If you are someone who might not have a lot of extra income to give gifts to everyone on your “wish to give” list then baking is the solution to your problem! In my opinion, creating a masterpiece in your kitchen is one the best frugal fabulous ways to give a heart felt gift.
I had the treat this last weekend to take a class from one of the best toffee makers I know, my mother in law! This toffee is not just your average crunchy confection. It has layers and layers of delicious flavor. I am so excited to share with you this recipe that is one of our families sweet staples during the holidays!

Side note: This recipe and all of the tips come from my mother in law, who has to be the most reliable source out there when talking toffee. I have been blessed to be a member of the family since my husband and I got married almost 8 years ago but I know that she has been making this stuff since long before I came in the picture. So she knows her stuff! Oh and this recipe is okay to double! Some candy recipes don’t work that way for some reason, but this one is good to double!
Lets get started! The type of nuts and the type of chocolate you use in this recipe are totally up to your taste buds. My mother in law uses pecans because that is what she likes. She also chooses to use half milk chocolate and half semi-sweet chocolate chips. She found that this is usually a good medium in catering to the tastes of all the many different mouths that she gifts this treat to.
Before you start heating anything up there are a few things you need to get ready. This is important because once you start cooking your ingredients you do not want to take your eyes or your stirring hand off the project! Make sure that you butter your pan! Trust me you do not want to miss this step! Next, chop all of the nuts. I like to chop them pretty small so when I’m taking bites of the toffee I taste more toffee then I do nuts. Now you can put your sugar, butter, and water in the pan, but don’t turn the heat on yet!


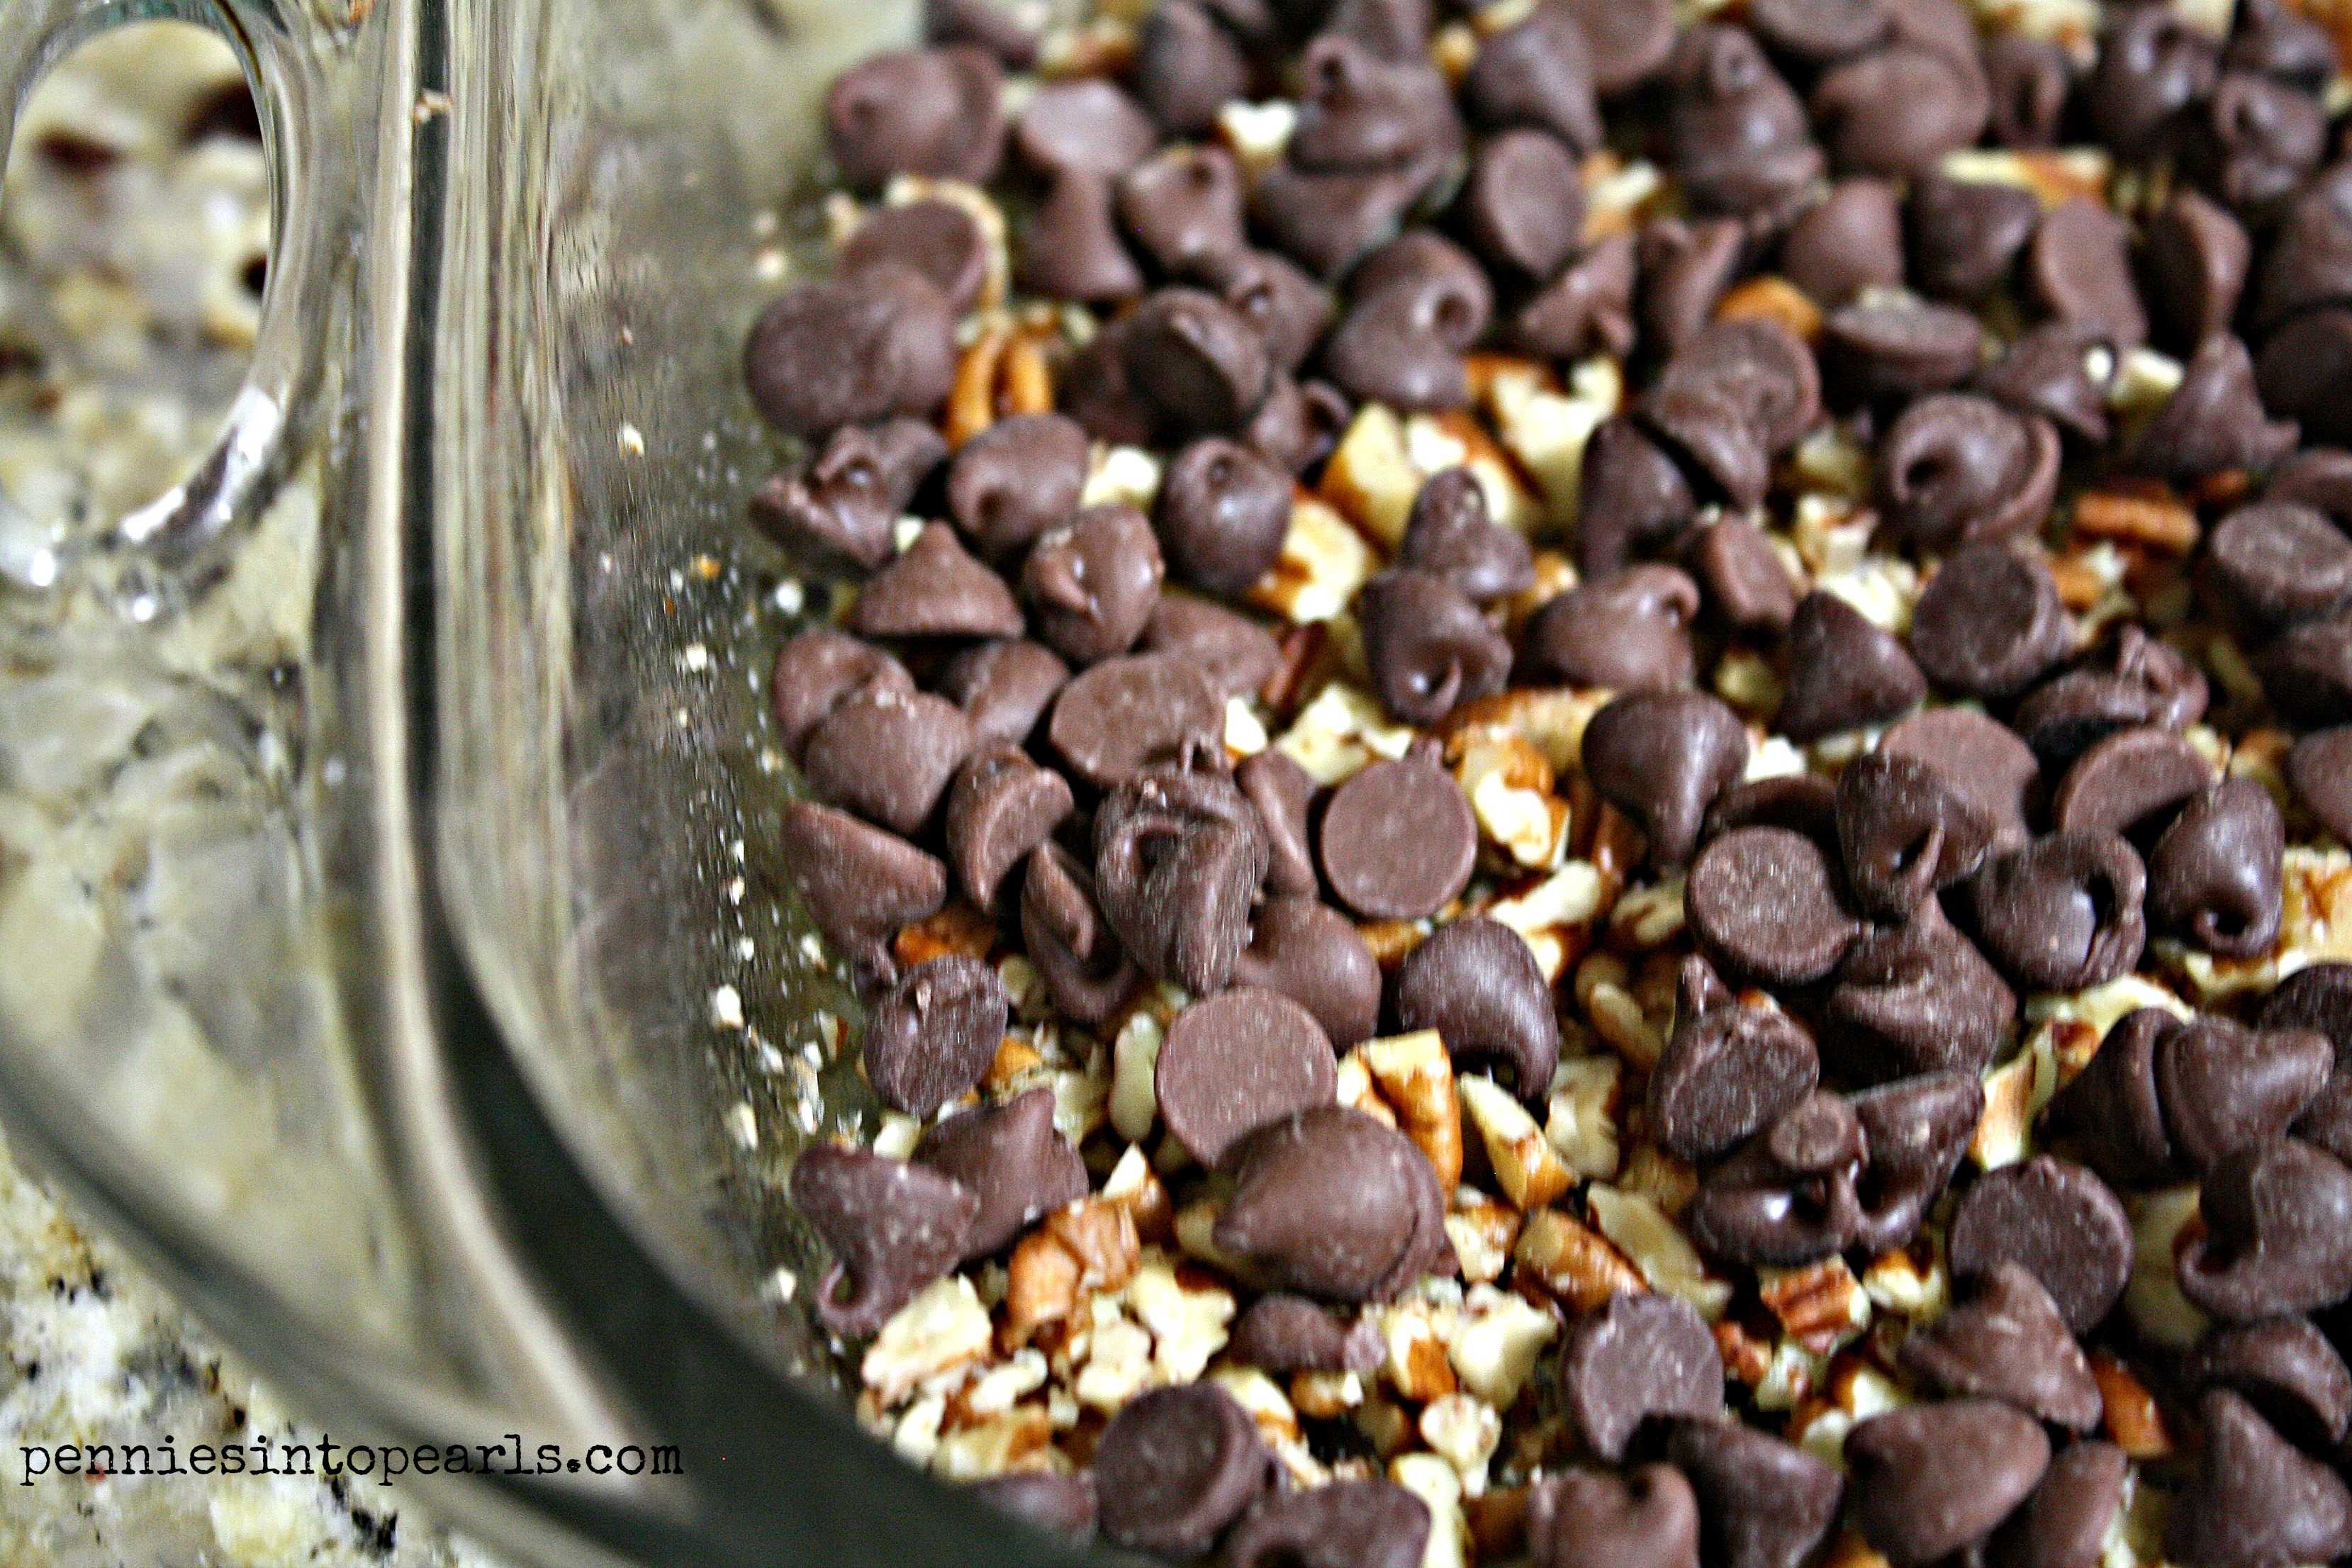
One more step before you start cooking. Put a layer of chopped nuts in your greased pan. Mix together both types of chocolate chips and put a layer over the nuts. This is not an exact science. If you like less nuts then put less nuts down, if you like more chocolate then put another handful of chocolate chips down. Whatever you think taste testers will love. You can see in this picture that we kind of go heavy on both ingredients. Go big or go home right!
Clip your candy thermometer on to your pan and now you’re ready to turn on the heat, medium heat to be exact. Once the butter starts melting you need to be constantly stirring to make sure that nothing gets burnt. Now cautiously stir and wait for the temperature of the candy to reach 320 degrees. At first the candy mixture is going to be white in color but as it cooks the sugar will slowly start to caramelize giving the candy its beautiful toffee color. Make sure to keep your eye on temperature. At first it might take a little time (a few minutes) to get the temperature to start moving up but once it starts getting close, around 300 degrees, it can shoot up really quickly. If once you get to this point and temp seems to be moving quickly you might want to turn your heat down a bit or maybe move the pan away from the heat for just a few seconds.
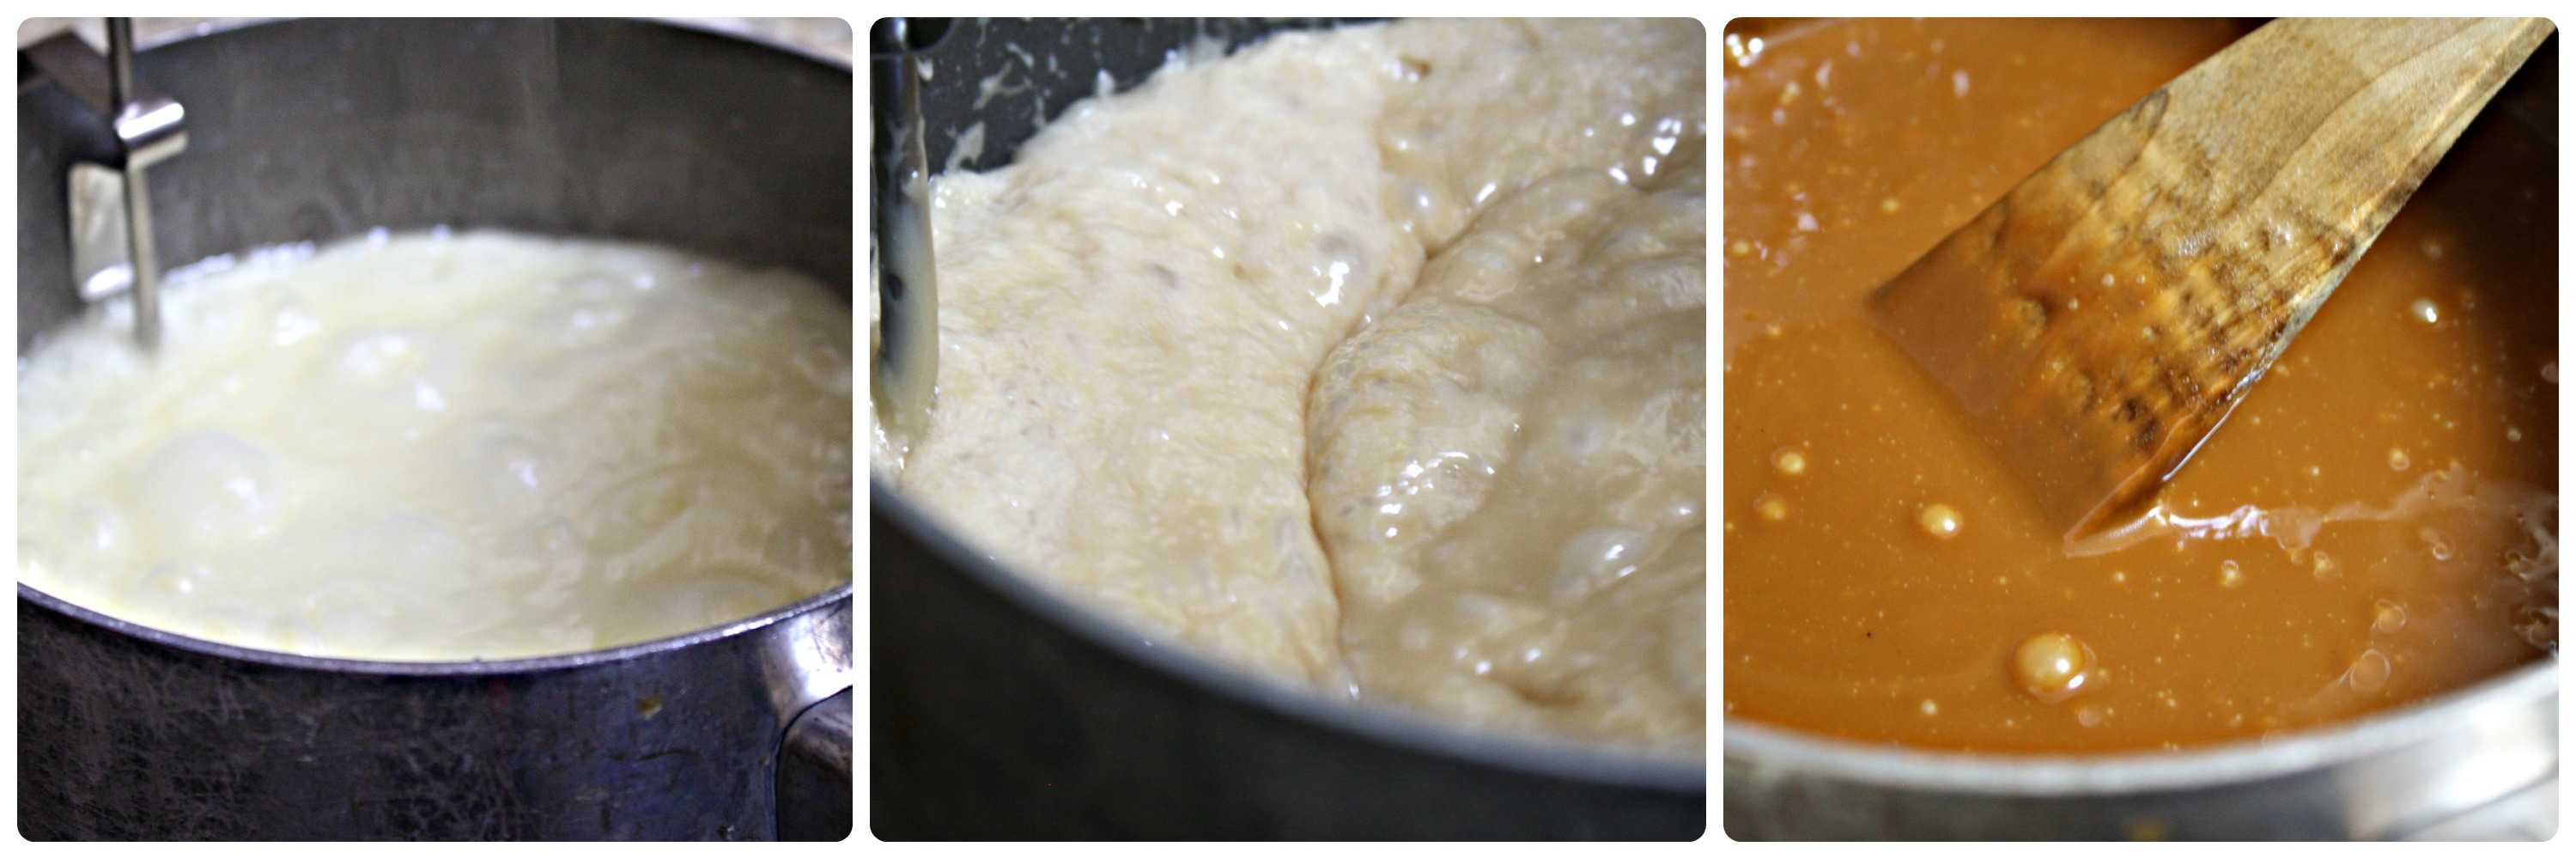
Once 320 degrees has been reached you need to move swiftly! Remove your pan from the heat and stir in the vanilla. Now evenly pour over your chocolate and nuts in the prepared pan.

Immediately sprinkle with more chocolate chips and cover with a cookie sheet for one minute, to help speed up the melting process. Remove cookie sheet and spread out chocolate to create a gooey chocolaty frosted layer and sprinkle with remaining chopped nuts and lightly pat down to set the nuts in place.


Let this sit for just a few minutes to let the candy set up just a bit. Now prick with a fork to create your grid of where you will want to cut the candy later.

Put in your fridge and let cool completely. Once cool you are ready to cut (you will be so glad that you made your prick grid) and enjoy! When you cut these out don’t be discouraged if they don’t come out in perfect little squares, because that’s just not going to happen. But that just adds the beauty of the candy pieces.
Super great tip from my mother in law: save all the little crumbs left in the pan once you take out all of the big candy pieces. This makes for a great ice cream topping!
Like I said before this is the perfect gift to pass out to your friends and family! It tastes better than anything you can buy at the store and it looks like a master confectioner created this sweet gift. Lastly, of coarse, this wouldn’t be Pennies into Pearls without mentioning that this gift idea is not only tasty and amazing but also easy on the wallet.

Here is a free Christmas tag printable to make your sweet gift giving even easier. Just print these out on some pretty cardstock, find some cute ribbon or maybe twine to attach, and you have a super frugal fabulous gift! Have fun and don’t forget to save a few pieces for yourself! Merry Christmas!

A special thank you to my really awesome mother in law for giving my a private candy making lesson and letting me share all of your tips!

Tastiest English Toffee
2014-12-15 10:03:40
Crunchy but not too hard and perfectly sweet english toffee.
Total Time
30 min
Ingredients
- 1 cup Sugar
- 1 cup Butter
- 3 tbs Water
- 1 tsp Vanilla
- 2 cups chopped Nuts (your choice)
- 1 cup Milk Chocolate Chips
- 1 cup Semisweet Chocolate Chips
Instructions
- Butter 9x9 glass pan.
- Sprinkle pan with half the nuts. Combine both types of chocolate chips together and sprinkle nuts with half of chocolate chips.
- Combine sugar, butter and water in pan over medium heat.
- Constantly stir over heat until temperature reaches 320 degrees.
- Stir in vanilla.
- Pour hot toffee mixture over chocolate and cut layers in pan.
- Sprinkle with remaining chocolate chips and cover for about one minute until chocolate has slightly melted.
- Spread chocolate to create an even layer over toffee and sprinkle with remaining chopped nuts and lightly pat nuts into chocolate.
- Prick with a fork where you want to cut later.
- Let cool completely in fridge before cutting.
- Cut and enjoy!
Notes
- This toffee recipe can be doubled and you're probably going to want to do this. It will disappear fast!
Pennies into Pearls https://www.penniesintopearls.com/
Linked up this baby at the following:
Wicked Awesome Wednesday
I Gotta Create
Whimsy Wednesday
Creative Spark
Artsy Corner
Creative Ways
A Handful of Everything
Inspire us Thursday
Thrifty Thursday

Lets start this week off sweet! All last week we were talking budgets. So let’s take a break and spoil our sweet tooth a little bit! One of my all time favorite dessert combos is peanut butter and chocolate, add cheesecake into the mix and it can only get better!
I made these mini cheesecakes for Thanksgiving last month and they were a big hit! The only thing I wish I did different would be to cook them for a little less time. The ratio of chocolate to peanut butter wash perfect! Sweet but not too sweet, just the right amount of creaminess, and you wont have to break the bank to make these sweeties. Tip: I usually save my cheesecake baking for when I find cream cheese on sale because that is usually the most expensive ingredient.

Okay I won’t tease you anymore, here is how you can create them:
First start by making the crust. In a food processor (or using a good old rolling pin) crush the chocolate grahams until they are almost dust. You are looking to get them to be the same consistency as sand. Now mix in the melted butter and keep stirring until it is completely combined. Now it should look and feel similar to wet sand. Makes sense right?


After placing your cupcake liners in your cupcake tray, fill each cupcake tray with about half an inch of your crumb mixture. Now firmly press the crumbs down to form a solid base for your treat. Set aside for later.

Lets start mixing! In your bowl for your standing mixer, mix together the peanut butter, cream cheese, sugar, and vanilla. Mix this until it is super creamy and well combined.

Now you can add the flower. Mix until completely combined.

Eggs are up next. Add the eggs ONE at a time. When making cheesecake it is important to mix the eggs in one at a time. Making sure that before adding the next egg the first has been completely incorporated into your batter. You will know it is totally mixed in when the batter has lost the shininess from the egg. When you see this, scrape down the sides of the bowl and add the next egg. It’s not as tricky as it sounds.

The batter is ready to be scooped into the cupcake tins. I filled mine a little over ¾ of the way full. Cheesecake doesn’t expand very much when baking so you don’t have to worry about that. Pop those babies in the oven preheated to 350 degrees for around 18 minutes. To decide if they are done what you’re looking for is the cake to be “set”. So if you shake the pan the cake might move a little but shouldn’t be jiggly.

While those are in the oven you can get your ganache ready. Place your chocolate chips and cream in a microwavable bowl and cook in microwave at 30 second intervals. Stirring after every session. I only cooked mine for a total of 1 minute. Just make sure to stir really well. When it gets completely melted, its done!
Once the cheesecake is finished cooking and has cooled off a little you can top them with the chocolate! I don’t like a huge amount of chocolate topping, so I did a small spoonful of chocolate and topped that with a few chopped nuts. I feel like when there is a lot of chocolate topping that the chocolate taste over powers the peaunut butter. So my opinion is less is more in this case.

By the way, I found a “mix nut” packet at the grocery store for just $1. So I didn’t have to buy a big expensive bag of peanuts. Plus, the mixture of salted and honey roasted nuts was a nice layer of flavor.
Now your ready to taste! Side note, before you put these beauties on display, they look better if you remove the paper liner. Now you can see the tasty layers of chocolate and peanut butter. Enjoy!

Peanut Butter and Chocolate Mini Cheesecake
2014-12-08 22:46:27
Yields 12
Tasty combo of peanut butter, chocolate, and cream cheese to create a delicious cheesecake.
Prep Time
15 min
Cook Time
18 min
Total Time
33 min
Ingredients
- 1 ½ cups ground chocolate graham crackers
- 3 tbs melted butter
- 16 oz (2 packages) cream cheese
- ½ cup peanut butter
- 2/3 cup sugar
- 1 tsp vanilla
- 1 tbs flour
- 2 eggs
- ½ cup chocolate chips
- 2 tbs heavy cream or milk
- ¼ chopped peanuts
Instructions
- Preheat oven to 350 degrees. Place cupcake liners in cupcake tins.
- Combine ground graham crackers and melted butter and fill cupcake liners with about ½ inch. Press down crumb mixture firmly.
- Cream together cream cheese, peanut butter, sugar, and vanilla until mixed completely and thoroughly.
- Add flour to mixture and combine.
- Add eggs one at a time. Make sure to completely combine before adding second egg.
- Scoop mixture into trays on top of graham crust, fill each a little over ¾ of the way full.
- Bake for about 18 minutes until cake is mostly set. Test by gently shaking tray. Look for little movement. Let cool before adding ganache topping.
- Combine chocolate chips and heavy cream in microwavable bowl. Heat in microwave for about 30 seconds. Take out and stir completely. Continue in 30 second intervals until smooth and chocolate is completely melted.
- Top cakes with small spoonful of chocolate mixture and chopped nuts.
- Let chill in fridge for at least 3 hours. Enjoy!
Pennies into Pearls https://www.penniesintopearls.com/
