fbpx
0
Browsing Category

Tutorials

1

DIY Craft – Roped Hurricane Vase

I have another easy frugal fabulous home décor project for you today! When I say easy I really am not kidding around! The supplies and time you need are very minimal and the total cost of east of these ended up around $2.

Roped Hurricane Vase - penniesintopearls.com - Easy DIY craft idea from copycat Homegoods decor. Super easy to follow tutorial on DIY craft project.

Copycat Inspiration
The original expensive piece that I used for inspiration on this project was spotted at one of my all time favorite stores Homegoods. As I walked into the store they had a beautiful table decorated with all sorts of nautical or roped items.

Roped Hurricane Vase - penniesintopearls.com - Easy DIY craft idea from copycat Homegoods decor. Super easy to follow tutorial on DIY craft project.

I walked up to these beautiful vases to see how much they cost, retail was about $25 each! I knew right then they weren’t meant for me to purchase that day but to go home and find something similar I could make for way less money! A DIY craft idea was born!

Items You Need
Any size glass jar or vase you like
Hot glue and gun
Rope (I bought this 50ft spool of rope at Home Depot for under $5)

Roped Hurricane Vase - penniesintopearls.com - Easy DIY craft idea from copycat Homegoods decor. Super easy to follow tutorial on DIY craft project.

DIY Craft How To

1. Make sure to get all of the gunk and dust off of your jars. I found these at one of our local thrift stores but they had this broken-apart stick design all over them. Luckily they just slipped off and soap and water was all I needed.

Roped Hurricane Vase - penniesintopearls.com - Easy DIY craft idea from copycat Homegoods decor. Super easy to follow tutorial on DIY craft project.
2. Decide where you want to place your rope. I was going to try and do an exact copycat design duplicate with these and the ones I saw at the store. But after I finished the first, I decided against that idea.
3. Start attaching the rope by placing a ribbon of hot glue along the base of the vase. Be sure to attach the rope before the glue dries. For the first layer or two of rope you will want to continually attach each part of the rope with glue.

As you are working try to keep the rope tight and each layer close together. You can do this by gently pressing down on the layers each time you add glue.

Once your first two layers are attached you can start using less glue. I used a small amount (about 1” long) on opposite sides of the glass about every two to three layers. But with your last two layers you will want to go back to using more glue.
4. Finish off the rope when you think it looks fabulous by doing a diagonal cut along the rope and attaching with hot glue. Try to tuck the end of the rope gently behind the lower layer.

Roped Hurricane Vase - penniesintopearls.com - Easy DIY craft idea from copycat Homegoods decor. Super easy to follow tutorial on DIY craft project.

That’s it! So quick and super frugal fabulous! Right now I am keeping these beauties on one of my entry tables in our home but my plan is to get some large candles to put inside each vase and move them out to live on our porch. Maybe when the holidays come along I will switch the candles out for some Christmas lights. So many options…

What do you think?
Where is your favorite place for DIY craft inspiration? Do you have some vases already at home that you want to do this project to? Let me know in the comments below. Let’s chat!

2

Get Your Shine On Link Party – Summer Is Not Over!


What’s going on!?

How is your summer going? Notice that I am not saying that it is over? I deny deny deny that summer is over until the temps dip below 70. (Which here, that could be well into October) I just don’t want it to end!

Anyways. Just a recap of a few of my favorite post memories that I stumbled upon this week. Do you remember any of these…

This pineapple bowl is not only beautiful but one of the tastiest meals I have ever made! In fact, I think this might be what I make next time we have guests over! Who wants to come over!?

Pineapple Bowl Teriyaki Chicken
Teriyaki Chicken Pineapple Bowl - penniesintopearls.com - Yummy pineapple recipes and fun fair food recipe

And while the weather is still beautiful maybe we should make it a goal to get outside every weekend! What do you think? This article is perfect to have fun without spending money!

20 Fugal and Fun Outdoor Activities
20 Frugal and Fun Outdoor Activities - penniesintopearls.com - Get your family outside this spring and summer and enjoy these frugal and fun outdoor activities for the entire family.

Okay! Who is ready to party?

get-your-shine-on-fall-image

Happy September, everyone! Welcome back to another week at the Get Your Shine On party. This week, Donella from Glue Sticks and Gumdrops has chosen her favorite links for her absolute favorite school subject: science! Before we get to the features, make sure you’re following our social media accounts where we share many of your posts each week!

Donella: Glue Sticks and Gumdrops | Pinterest |Facebook | Twitter | Google+ | Instagram

Kristi: The Classy Chapter | Pinterest | Facebook | Twitter | Google+ | Instagram

Brittany: Pennies Into Pearls | Pinterest | Facebook | Twitter | YouTube | Instagram

This week’s features are all about fun science activities! Your kids will be delighted and amazed with these fun experiments and crafts.

circuitbugs5Circuit Bugs from Steam Powered Family

Summer-Science-4-500x500Top 10 Summer Science Experiments for Kids by The Science Kiddo

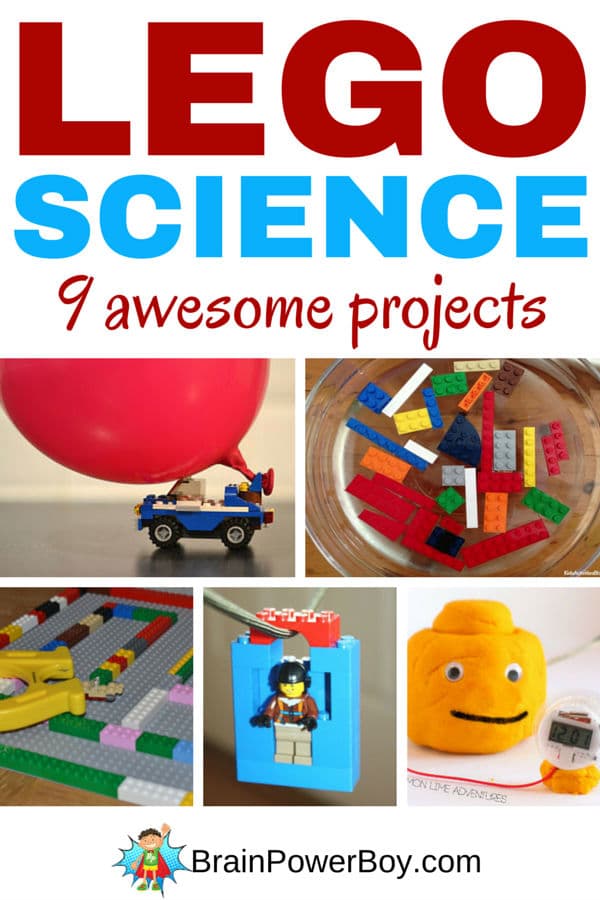
LEGO-Learning-Science-projectsLego Science by Brain Power Boy

Please visit the original links to share and pin! Before we move on to the party, we have just a few rules.

Party Rules:

  1. We want to see all your best recipes, crafts and family-friendly posts. Basically, anything goes except links to other parties, Etsy shops, giveaways or product reviews.
  2. Follow your hosts on some form of social media. (See our links above.)
  3. By linking up, you are agreeing that we can feature one picture from your post in a collage or on social media. You are also agreeing that we may use your email address to notify you of link party-related events.
  4. (Optional) Link back to us in some way, either on your party page or in your post.


Get Your Shine On Link Party – Featured: School Is In Session

Welcome back to the party! This week I have been looking back over the last few months and found a couple things here on the blog that I thought you might be interested in. 

The whole idea of Pennies Into Pearls is spending frugal but living fabulous! So here are a few of my top posts from the last few months.

$2 Bulletin Board Makeover
$2 Bulletin Board Makeover - penniesintopearls.com - Tips on how to makeover a thrift store find for crazy cheap!How to be a “Casual Couponer”
Casual Couponing 101 - penniesintopearls.com - save money with no newspapers, minimal clipping, and very little time!
Pallet Wood Hearts (cost me ZERO dollars!)
Pallet Wood Hearts - penniesintopearls.com - step by step instructions on how to make your own pallet wood crafts

Take a look and let me know what you think. What else would you like to see on Pennies Into Pearls?

Now, on to the party… 

Get Your Shine On Link Party - penniesintopearls.com - Link party with tons of fresh ideas for crafts, DIY projects, and recipes

Welcome to this week’s Get Your Shine On linky party! We’re so glad that you’ve stopped by. Brittany from Pennies Into Pearls chose this week’s features, and this week is all about back to school. So let’s get to those fantastic posts and get this linky party started!

Donella: Glue Sticks and Gumdrops | Pinterest |Facebook | Twitter | Google+ | Instagram

Kristi: The Classy Chapter | Pinterest | Facebook | Twitter | Google+ | Instagram

Brittany: Pennies Into Pearls | Pinterest | Facebook | Twitter | YouTube | Instagram

Here are a few of our favorite posts from last week’s party: 

DIY Back to School Number Props from Life Is Sweeter By Design
Get Your Shine On Link Party

9 Back to School Items for Your Teen Daughter from Independent Smart DivaGet Your Shine On Link Party

Tips to Keep Your Child Healthy This School Year from Life is Sweeter by Design
Get Your Shine On Link Party

Please visit the features and pin them from the original sources. Visit each other, too. It’s the nice thing to do. 🙂

Party Rules:

  1. We want to see all your best recipes, crafts and family-friendly posts. Basically, anything goes except links to other parties, Etsy shops, giveaways or product reviews.
  2. Follow your hosts on some form of social media. (See our links above.)
  3. By linking up, you are agreeing that we can feature one picture from your post in a collage or on social media. You are also agreeing that we may use your email address to notify you of link party-related events.
  4. (Optional) Link back to us in some way, either on your party page or in your post.


1

The Best Way To Cook Hot Dogs

I was first introduced to this method of how to cook hot dogs from my father-in-law. I have never been a huge hot dog fan but I was so curious once I saw these beautifully filleted hot dogs I couldn’t say no to trying them out.

Let me tell you, spiral cut hot dogs can make even your most inexpensive hot dog taste gourmet! With this unique cut it allows each bite of your dog to become caramelized and flawlessly cooked to perfection.

Spiral Cut Hot Dogs - penniesintopearls.com - The very best way how to cook hot dogs. Easy and delicious idea! Continue Reading →

1

Get Your Shine On Link Party

Get Your Shine On Link Party

Welcome to this week’s Get Your Shine On linky party. We’re so glad that you’ve stopped by. Kristi from The Classy Chapter chose this week’s features, and we think that you’ll like them, too. So let’s get to those fantastic posts and get this linky party started!

Donella: Glue Sticks and Gumdrops | Pinterest |Facebook | Twitter | Google+ | Instagram

Kristi: The Classy Chapter | Pinterest | Facebook | Twitter | Google+ | Instagram

Brittany: Pennies Into Pearls | Pinterest | Facebook | Twitter | YouTube | Instagram

Here are a few of our favorite posts from last week’s party:

7cb969f4-c713-4349-9e59-b9fd2419285f_zpsf2evmxbo


Dipped Ice Cream Cups from Daily Dose of Design

homemadebakingmix


Homemade Baking Mix from Retro Housewife Goes Green

Happy-everything-wreath-vertical-graphic

Wooden Wreath Sign from Where the Smiles Have Been

Please visit the features and pin them from the original sources. Visit each other, too. It’s the nice thing to do. 🙂

Party Rules:

  1. We want to see all your best recipes, crafts and family-friendly posts. Basically, anything goes except links to other parties, Etsy shops, giveaways or product reviews.
  2. Follow your hosts on some form of social media. (See our links above.)
  3. By linking up, you are agreeing that we can feature one picture from your post in a collage or on social media. You are also agreeing that we may use your email address to notify you of link party-related events.
  4. (Optional) Link back to us in some way, either on your party page or in your post.


Peach Cobbler Muffins

Have you walked through the produce isle lately and been hit with the sweet smell of peaches? What a great time of year to have so many delicious fruits and veggies in season. And you know what that means when they are in season… they are going to be on sale!

One of our local stores was having a great sale on peaches and I snatched up over 10 pounds of these peachy girls! We ate some and we froze the rest. It has been heavenly having them in our smoothies!

But now it’s time for something new! Taking our love of peach cobbler and our need for a new breakfast item we created this masterpiece!

Peach Cobbler Muffins - penniesintopearls.com - Easy breakfast idea. Peach cobbler muffins full of peaches and everything else that makes cobbler delicious but for breakfast! Continue Reading →

Darling DIY Pencil Case Tutorial

Get ready for a super cute and super easy sewing project brought to you from Charlene over at Thinking Outside the Pot. Not only is this tutorial super easy to follow along and you end up with a really cute DIY pencil case at the end but she has even more great ideas on her blog! So make sure to check it out once you get all these tips. 

Thanks again Charlene for sharing your super cute craft with us! 

DIY Back-to-School Pencil Bag - penniesintopearls.com - Follow these easy steps to make your own DIY pencil bag. Get the kids back to school in style and on budget!

Brittany contacted me at the beginning of the summer to see if I wanted to do this post. I was so excited to do a back-to-school post for her. I love Pennies into Pearls. It is such a fun site, and I love how much you can learn from Brittany.

Her motto of making pennies into pearls is just so clever. Sometimes it is just easier to go buy something rather than make it. Is it really saving you any money though? I think not! I love that so many things can be made yourself easier and cheaper rather than buying them.

If you visit my blog Thinking Outside the Pot you will see how much I love Diy projects. I have several different diy projects that I hope you all will love.

I am so in love with this new diy back-to-school pencil case I made! It’s so easy and I made it in about an hour. I am sure the next one I make I will be able to make it quicker though. They are just that easy. This would be a great project for your kids to do during those last weeks before school starts. Crazy that summer has flown by so fast, and school is about to start. Lets start out a great year with a pretty rad pencil bag. Enjoy!

How to Make Your Own DIY Pencil Case

Things you need:

1 fat quarter fabric for the lining

1 fat quarter fabric for the outside piece

1- 9 inch zipper

scissors

sewing machine

measuring tape

thread

1st step: Cut both fabrics to be 9.5 x 5.5. You will need two of each fabric.

DIY Back-to-School Pencil Bag - penniesintopearls.com - Follow these easy 4 steps to make your own DIY pencil bag. Get the kids back to school in style and on budget!

2nd step: Place one of your outer pieces right-side up, and place the zipper face down along the long edge. Place the lining piece on top of the zipper, right-side down. Pin in place. With a zipper foot, sew all three layers together along the top edge.

DIY Back-to-School Pencil Bag - penniesintopearls.com - Follow these easy 4 steps to make your own DIY pencil bag. Get the kids back to school in style and on budget!

3rd step: Fold the sewn pieces out of the way, and sandwich the other half of the zipper between the other two pieces of fabric. Outer fabric right-side up, zipper right-side down, lining fabric right-side down. Pin in place, then sew this edge.

DIY Back-to-School Pencil Bag - penniesintopearls.com - Follow these easy 4 steps to make your own DIY pencil bag. Get the kids back to school in style and on budget!

4th step: Pull the fabric layers away from the zipper, and press with an iron.

5th step: Pin the lining fabrics together and the outer fabrics together, folding the seam allowance and zipper toward the lining. Make sure to leave your zipper halfway open. Also I always put two pins right where I am leaving an opening. This way you don’t forget to leave it open.

4th step bag

6th step: Sew around the edges of the lining and outer fabrics, leaving an opening of about 2 inches on the bottom of the lining.

7th step: Snip the corners and excess zipper tape, and turn the bag right-side-out by pulling the outer fabric through the gap in the lining. After you do this, you may need to fiddle with it to get the corners all straight. I pulled the lining out a little and used my sewing machine and sewed the opening up with a zig zag stitch.

pencil bag

Tip: if it bugs you that the lining is not attached to the outer fabric you can sew fusible lining between the fabrics then iron it. This will keep it in place. I just thought it worked great with out. 

Don’t forget to check out my blog Thinking Outside The Pot!

What do you think?
So don’t you just love this super easy and cheap idea from Charlene!? Have you ever made something like this before? Are you motivated to try it out? Let me know in the comments below. I would love to hear about your back to school projects! 

Get Your Shine On Link Party – It’s All About Fun!

Welcome back to the party! Before we get started here are a few things that you might like to indulge in before the summer comes to a close.

My favorite fair recipe this year. PS it is actually healthy! Get the recipe for these Teriyaki Chicken Pineapple bowls here! They are way easier to make then they look. 
Teriyaki Chicken Pineapple Bowl - penniesintopearls.com - Yummy pineapple recipes and fun fair food recipe

It’s not to late to check a few things off a summer bucket list. Check out this Memorable Summer Bucket List to create some lasting memories and without breaking open your piggy bank! 
Summer Bucket List 2015 - penniesintopearls.com - Make a memorable summer with this summer bucket list. Fun and frugal summer bucket list.

Hope you enjoy these articles to finish off your summer with a bang! Now, on to the party… 

Get Your Shine On Link Party - penniesintopearls.com - Link party with tons of fresh ideas for crafts, DIY projects, and recipes

Welcome to this week’s Get Your Shine On linky party. We’re so glad that you’ve stopped by. Brittany from Pennies Into Pearls chose this week’s features, and we think that you’ll like them, too. So let’s get to those fantastic posts and get this linky party started!

Donella: Glue Sticks and Gumdrops | Pinterest |Facebook | Twitter | Google+ | Instagram

Kristi: The Classy Chapter | Pinterest | Facebook | Twitter | Google+ | Instagram

Brittany: Pennies Into Pearls | Pinterest | Facebook | Twitter | YouTube | Instagram

Here are a few of our favorite posts from last week’s party:

Easy Stovetop Popcorn from Retro Housewife

Get Your Shine On Link Party


Oreo Ice Cream Cupcakes from Nerdy Foodie Mom
Get Your Shine On Link Party

15 Fun Kid Friendly Lunch Boxes Under $20 from Savings Sarah

Get Your Shine On Link Party

Please visit the features and pin them from the original sources. Visit each other, too. It’s the nice thing to do. 🙂

Party Rules:

  1. We want to see all your best recipes, crafts and family-friendly posts. Basically, anything goes except links to other parties, Etsy shops, giveaways or product reviews.
  2. Follow your hosts on some form of social media. (See our links above.)
  3. By linking up, you are agreeing that we can feature one picture from your post in a collage or on social media. You are also agreeing that we may use your email address to notify you of link party-related events.
  4. (Optional) Link back to us in some way, either on your party page or in your post.


Coffee Table Makeover

Have you guys heard about an amazing blog called Refashionably Late? It is absolutely frugal fabulous! Ruth does such a perfect job of making over furniture and  she has so many wonderful DIY furniture refinish and repurposing projects all over her blog. After you read this guest post from her you really need to go check her out! Thank you so much Ruthie for popping in and sharing this beyond cute project!

Coffee Table Makeover

Here she is: 

coffee table makeover

First off, thank you to Brittany for having me guest post on Pennies Into Pearls today! I’m super excited to get to know her followers and share my love for furniture restoration and DIY projects! If you like what you see please come check out my blog, Refashionably Late!

So a little bit about me, I am a huge Craigslist addict! I love to find deals on items and what I love even more is finding FREE items on Craigslist! Craigslist can be hit or miss but if you wait patiently you’ll find some really great stuff! Something I discovered a couple months ago was Craigslist email alerts. You can sign up an account and have Craigslist email you when a specific item you are looking for becomes available. For more details regarding Craigslist alerts go to one of my favorite blogs, Gwen at The Makerista.

coffee table makeover

The Details
Anyways….I scored this little gem on Craigslist for free!! How awesome is that!? Now it’s not terrible to start with, but it does need a little TLC. The vinyl was peeling a little and there were some scuffs and dings. I started with sanding the table with my electric sander and smoothing the edges with regular sand paper.

Once it was finished I dusted it all off and taped off the strip of lighter wood on the top of the table. I used Frog Tape because I find that to be the best when trying to make straight lines with no bleeding paint. I wanted to stain that section a darker color once I finished painting the rest of the table.
coffee table makeover

I’m a huge fan of spray paint, especially for primer, and it’s even better when the paint is primer and paint in one! I gave the table 3 coats of one of my favorite colors, Valspar Indigo Streamer. I gave the table an hour or so to dry in between coats. The can says you can recoat at any time though. I like to see how it dries before applying another coat because wet paint can be deceiving.
coffee table makeover

I let the blue paint dry over night to make sure when I removed the line that I had a nice straight line with no runs. Unfortunately, some dust got under one section of the paint so it painted over the lighter wood stripe. I was actually okay with it because I was starting to think I’d like it to be painted white. I put the frog tape on either side of the stripe and began painting it white. I did 3 coats of white with a light sand in between the 2nd and 3rd coat to ensure it had a nice, smooth finish. 
coffee table makeover

I removed the tape and it looks amazing! I’m super happy with how it turned out! Also….always do a couple coats of polyurethane on top of your projects. Especially furniture that will endure lots of traffic! I think coffee tables might fall under that category! 😉
coffee table makeover

Coffee Table Makeover

It was totally meant to be that the dust got under the tape which allowed the blue spray paint to leak! I am loving the white stripe! I can see this piece in a bachelors pad but I’m kind of loving it in my living room! I’m a little obsessed with the color blue lately and love accenting my home with all different shades of blue.

This isn’t my first table makeover, check out two of my previous makeovers on the blog! I gave my kitchen table a face lift with some paint and stenciling on top! I also turned an old coffee table into a beautiful large ottoman! I would love for you to stop by and say hello and while your at it check out my other projects in my project gallery! 🙂

Thanks Brittany for having me today! I’m a big fan of your work and so thankful to have contributed to your blog! Have a great day everyone!